Configuring Intune for macOS part 1 - Setup a macOS VM

Premise
One of my clients has an Apple only environment. The client was previously managed with Jamf. Jamf is a great MDM platform for Apple devices and works really well however there are some downsides. First, the cost of Jamf is quite high, also while Jamf does support M365 condtional access and SSO with M365, it requires a bit more configuration than Intune does. My client was already paying for Enterprise mobility and Security licensing through M365 with Defender ATP for Endpoint so why not take advantage of the included Intune licensing? I feel Intune has matured enough to fully manage the MDM needs for Apple devices so lets dive into getting started!
Getting Started - Setup a macOS VM
My first hurdle to overcome was the need for a test environment. I like to fully test configuration scenarios before deploying anything to production. I however do not own any Apple hardware, and I did not want to shell out ~$600 for a current mac mini. In comes the OSX-KVM project on Github. This project makes it super simple to setup a macOS VM. All you will need is a PC with either an Intel or AMD processor that supports AVX2 and a compatible Linux distribution. I have personally tested this on both Pop!_OS 21.10 on my PC and Ubuntu 21.10 on my home ESXi server with Ubuntu 21.10 using nested virtualization. You could even set this up inside the live boot environment of Ubuntu/pop!_OS without even needing to install the OS on your system, though you would want a large enough flash drive to store all the files, at least 64GB.
If you only have one PC and you don’t want to do a traditional dual boot, I recommend just picking up an additional 120GB SATA SSD. Install your Linux distro to that and simply use your EFI’s boot menu to select which hard drive to boot off of, either Windows or Linux. Just be careful when installing your Linux distro to not overwrite your Windows installation! To be on the safe side, just unplug your current boot hard drive with Windows before installing Linux.
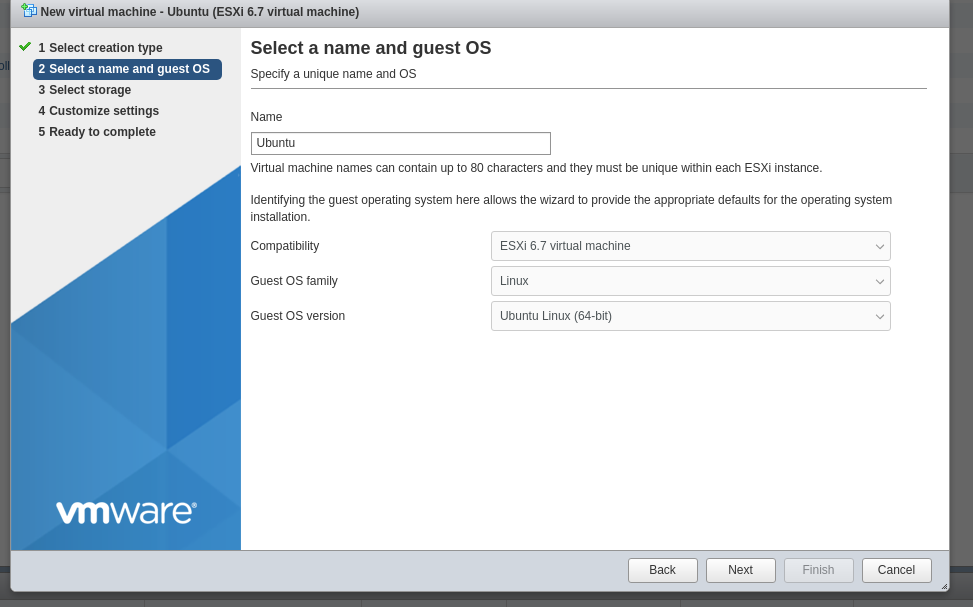
For this demo, I will be installing Ubuntu 21.10 os ESXi. Create a new VM, Select Linux as the guest OS and Ubuntu Linux 64bit as the OS version. Doing this will automate the vmware tools installation.
First, download the Ubuntu installation ISO. Once downloaded, go ahead and upload the ISO to your ESXi datastore. Select storage, the data store, click “Datastore Browser”, then select upload.
On the settings page, I recommend giving the VM at 6 cpus and 12GB of ram and 120GB of storage. You could probably skirt by with less but just be aware your macOS VM will be very slow. Expand the CD/DVD options, and connect your Ubuntu ISO
Before you power on the VM, edit the settings. Expand CPU, and enable Hardware virtualization
Under VM Options, expand Boot Options. Change the firmware setting to EFI. Now, go ahead and boot the VM. Select Install Ubuntu, and just continue through the prompts with default settings. The installation is fairly quick.
Once you are logged into the desktop, right click on the desktop and select desktop settings. Change the resolution to 1920x1080 (or whatever you prefer).
Go ahead and install any OS updates and reboot. Open up the OSX-KVM project on GitHub and follow the instructions there for setting up your VM.
Here are a few tips that are not explained in the github readme:
-
The virtual machine defaults to 3GB of ram which really is not enough for macOS. You can add additonal ram by editing the. Run the following command to open the OpenCore-Boot script in gedit
gedit ~/OSX-KVM/OpenCore-Boot.sh -
Edit the line ALLOCATED_RAM. I recommend setting this to 8GB (8192 MiB)
-
Once you have the VM booted and and logged in, I strongly suggest disabling the sleep / screen blank option in macOS power settings.
Now we have a VM ready for testing. See part 2 for BYOD enrollment and configuration profile setup.